Most warehouses don’t have a packaging problem — they have a workflow problem. The cushioning material is somewhere across the room. The pre-cut bubble wrap ran out mid-shift. Someone spent three minutes hunting for the right-sized piece of foam. Multiply that by 200 orders a day, and you’ve quietly lost hours of productive time.
Integrating a paper bubble machine directly into your packing station solves this at the source. When the machine sits within arm’s reach and produces cushioning on demand, the friction disappears — and so does the wasted time. This guide walks you through exactly how to do it: from physical placement and ergonomic setup to paper roll management, workflow sequencing, and measuring the results.
Why Packing Station Design Matters More Than You Think
Before touching the machine itself, it’s worth understanding why packing station layout has such an outsized impact on throughput. Research from Sealed Air found that packaging efficiency in manual operations rarely exceeds 60%, and product pickers walk an average of 15 miles per day 1. A significant portion of that movement — and that lost efficiency — happens at the packing bench itself: reaching for materials, waiting for pre-made cushioning to be restocked, or adapting the wrong material to fit an odd-shaped product.
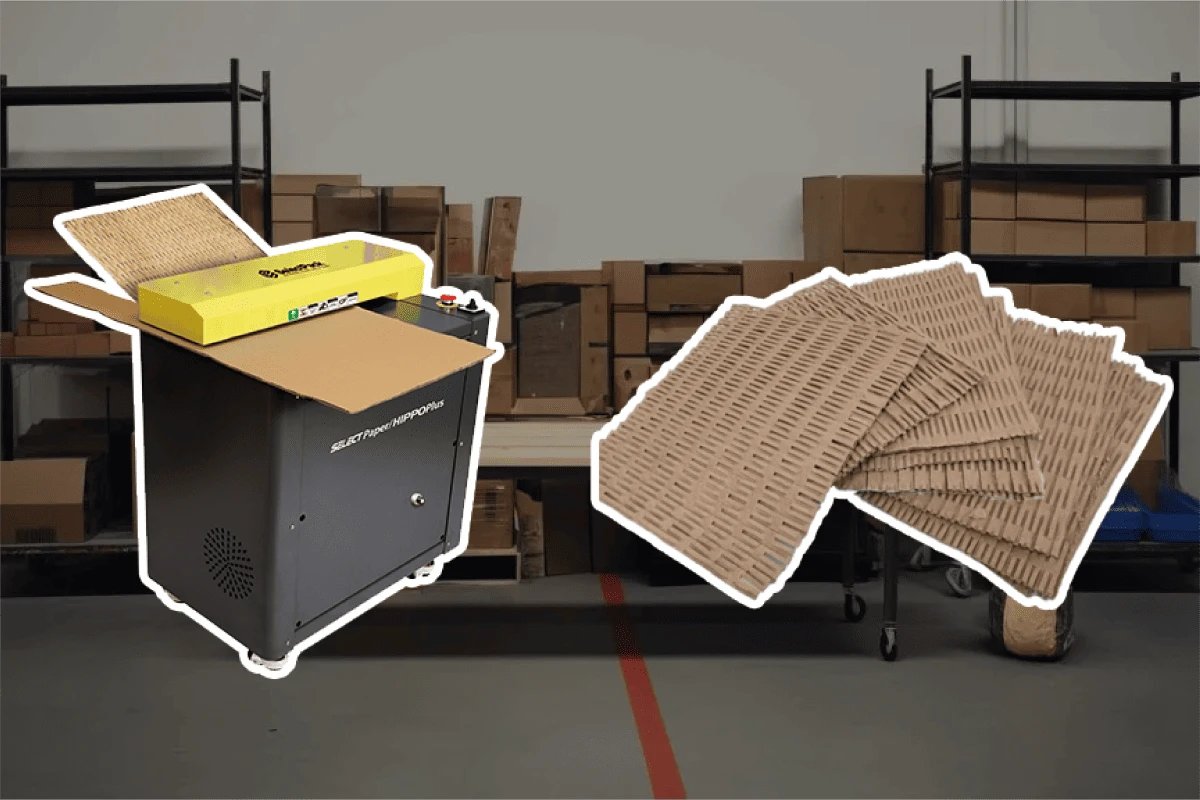
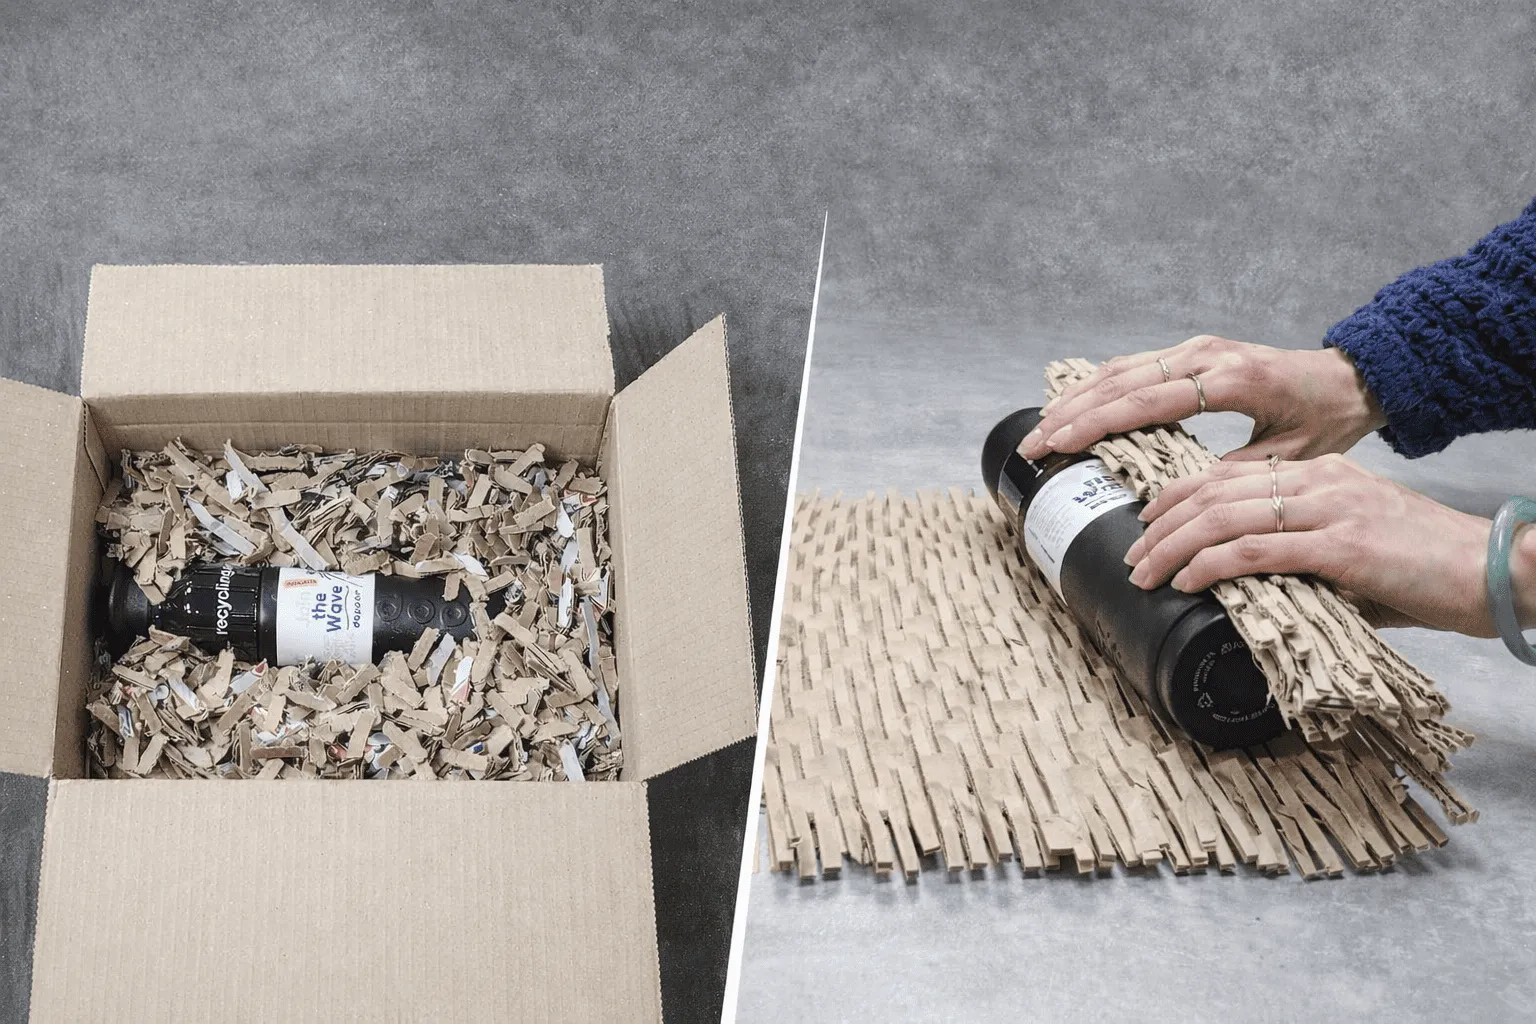
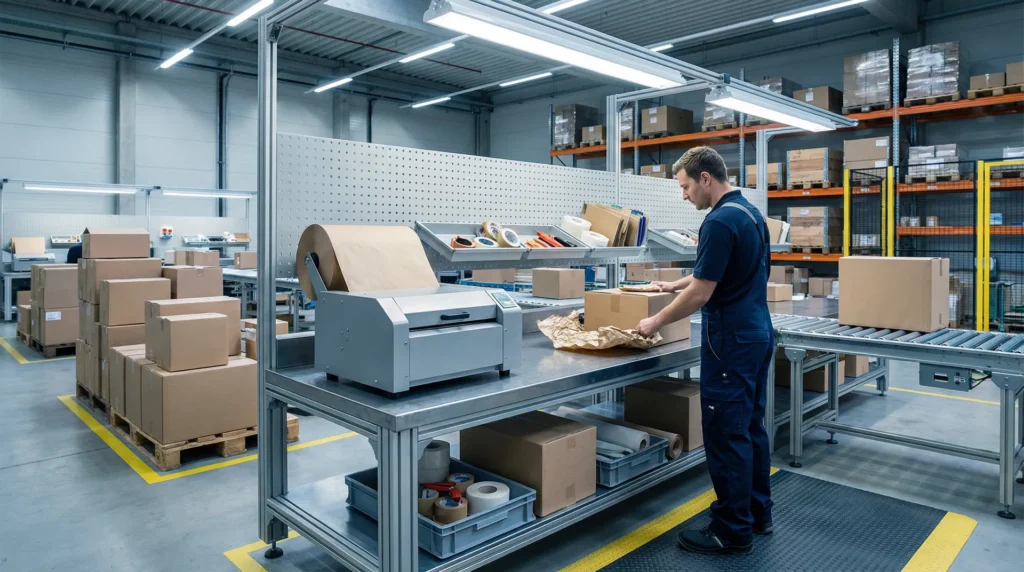
A paper bubble machine changes the equation by eliminating the pre-staging step entirely. Instead of storing large volumes of pre-made cushioning, the machine converts a compact kraft paper roll into bubble-textured cushioning precisely when and where it’s needed. The result is a tighter, faster, more predictable workflow — but only if the machine is positioned and integrated correctly.
Step 1: Audit Your Current Packing Station
The first step is honest observation. Before moving anything, spend 30 minutes watching how your team actually packs. Where do they reach? Where do they pause? Where does material run out or pile up?
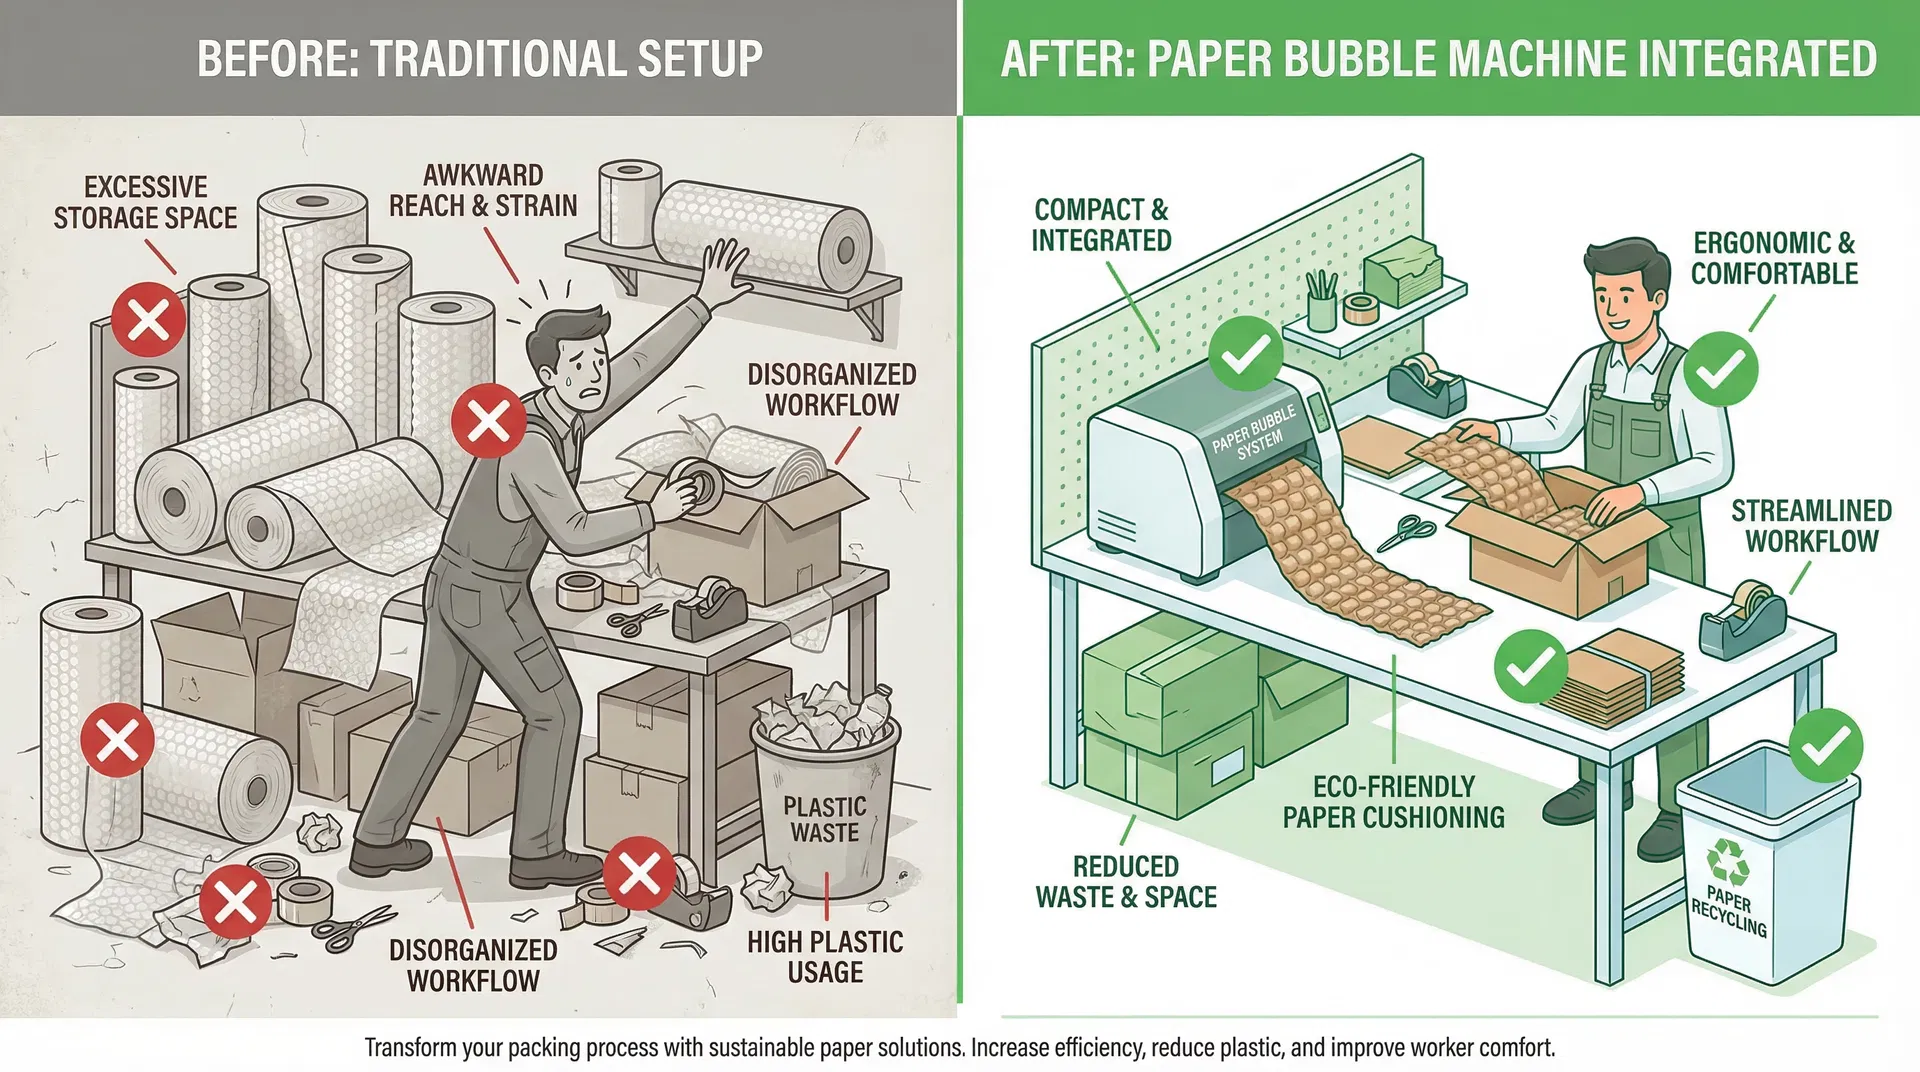
Most packing stations share a common set of inefficiencies: cushioning material stored on a separate shelf or cart, forcing the operator to turn or step away; pre-made rolls that are too large to handle quickly; and inconsistent material usage because there’s no easy way to cut exactly the right amount. Document these friction points — they’ll guide every placement decision that follows.
Also measure your current bench dimensions and note the position of your conveyor, scanner, label printer, and tape dispenser. These fixed elements define the constraints you’re working within.
Step 2: Choose the Right Machine Footprint for Your Station
Paper bubble machines vary significantly in size. Desktop models designed for small-to-medium operations typically measure around 40–55 cm in width and 30–40 cm in depth — roughly the footprint of a large monitor. Industrial models for high-volume operations can be larger, sometimes requiring a dedicated side table or floor-mounted stand.
| Machine Type | Typical Footprint | Best Suited For |
| Desktop / Tabletop | 40–55 cm W × 30–40 cm D | 50–300 orders/day, limited bench space |
| Mid-range | 55–70 cm W × 40–50 cm D | 300–800 orders/day, dedicated bench position |
| Industrial | 70+ cm W × 50+ cm D | 800+ orders/day, multi-station deployment |
SelectPack’s Pangolin series is designed with compact footprints specifically to fit within standard packing bench configurations, making integration straightforward without requiring a full station redesign.
Step 3: Position the Machine for Ergonomic Efficiency
This is where most integrations succeed or fail. Placement determines whether the machine accelerates your workflow or creates new friction.
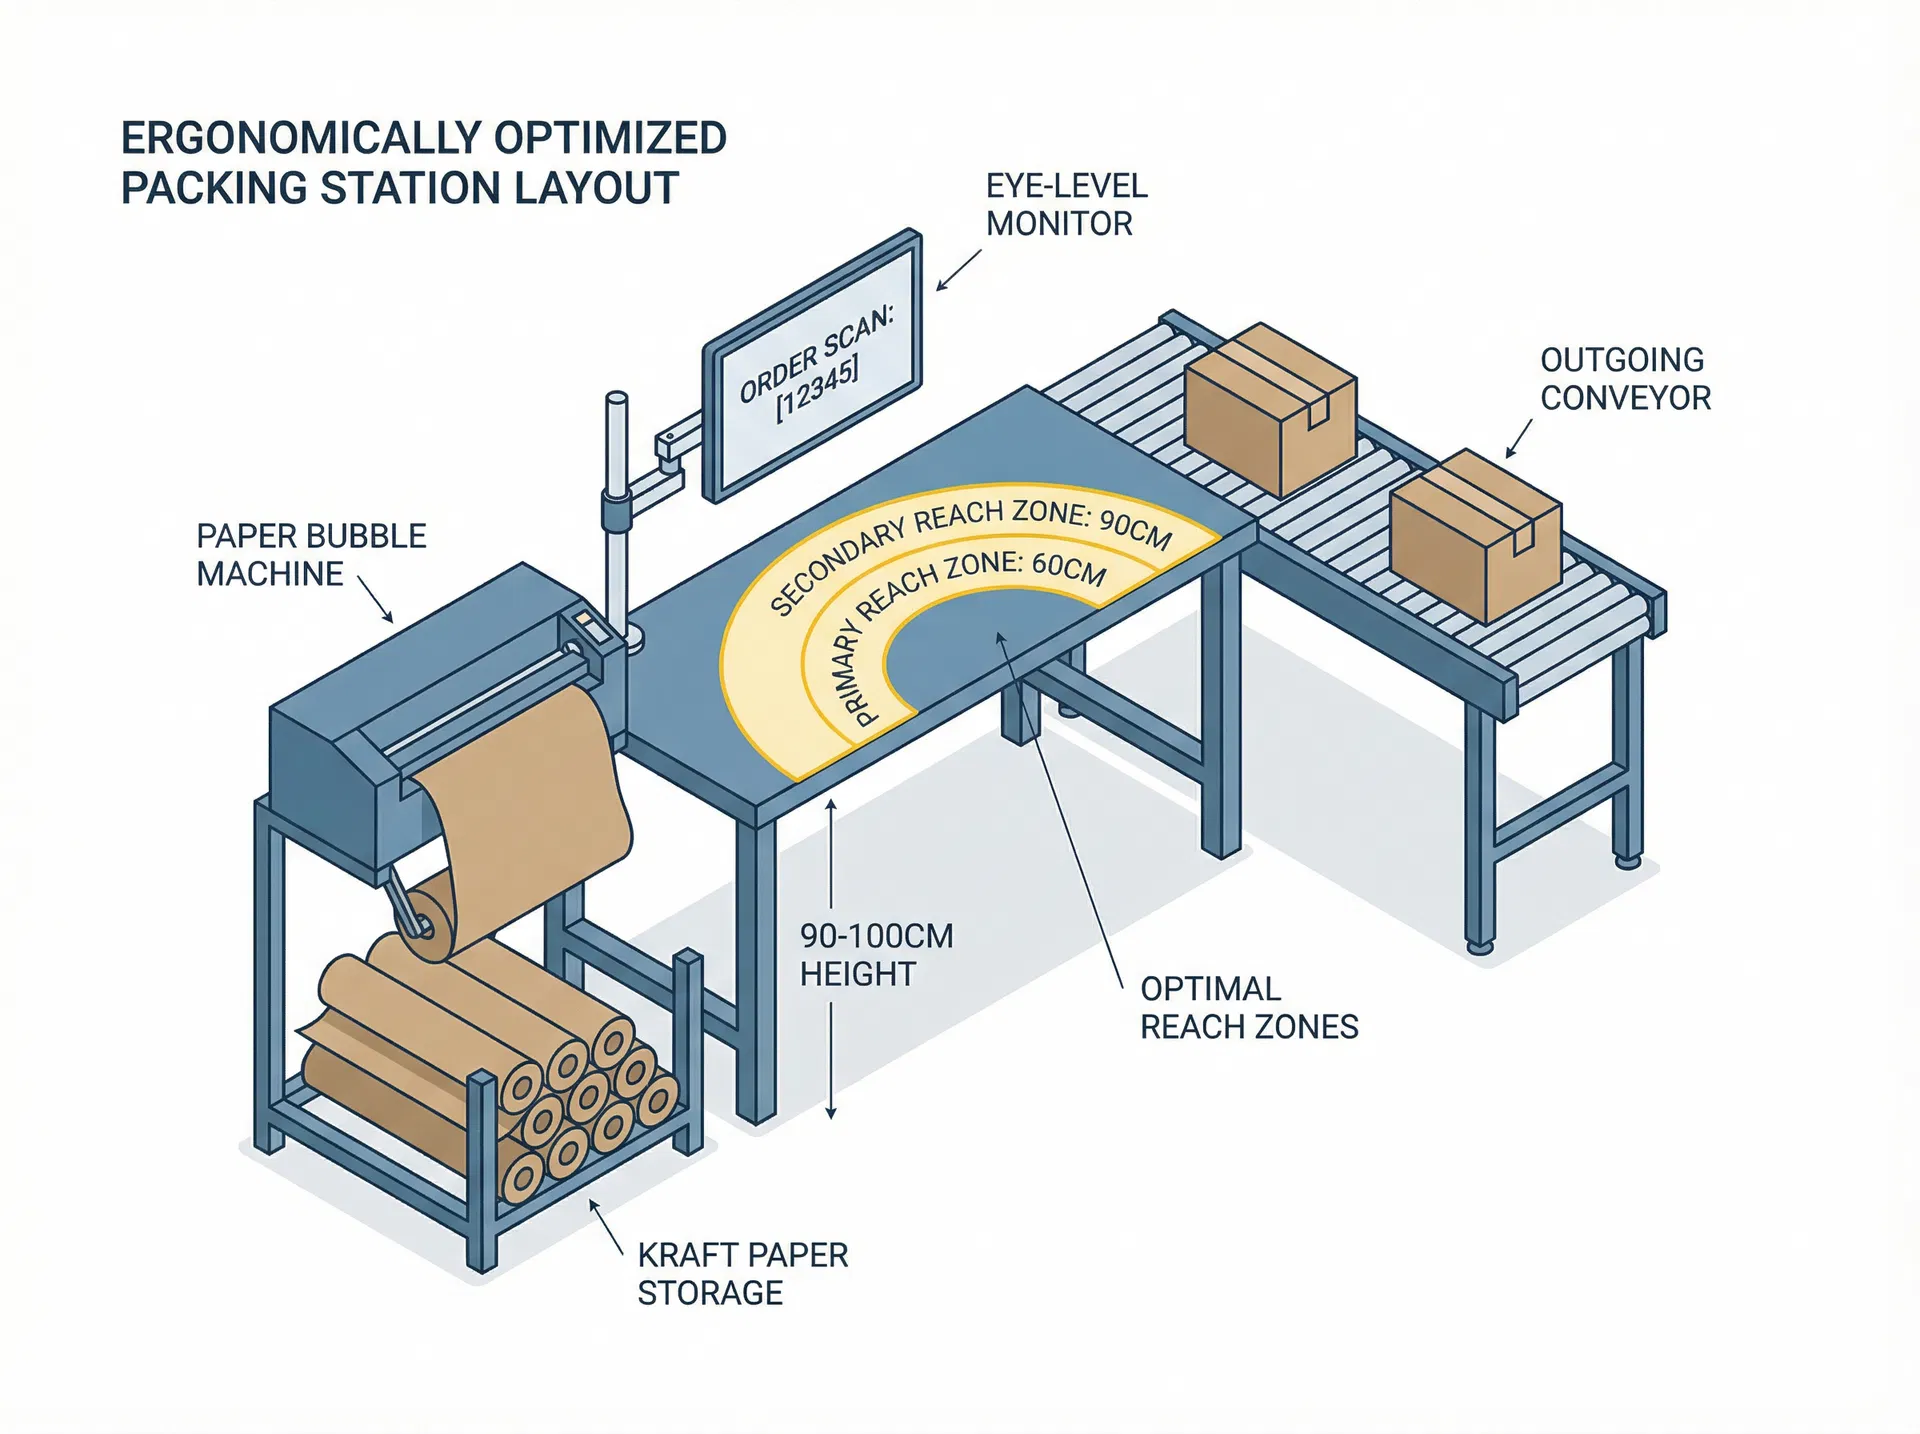
The golden rule is dominant-hand proximity. The machine’s output slot should sit within the operator’s primary reach zone — approximately 60 cm from their standing position — on their dominant side. For a right-handed packer, this typically means the machine sits to the left of center on the bench, with the output feeding toward the right where the product and box are being packed.
Bench height matters as much as horizontal position. The standard ergonomic bench height for standing work is 90–100 cm, but the optimal height depends on the task. Packing involves a combination of wrapping, placing, and sealing — all of which benefit from a bench surface that allows the operator to work with slightly bent elbows rather than reaching up or hunching down. If your bench is fixed, a machine stand or riser can adjust the output height to the ideal position.
Keep the output path clear. The machine needs 30–40 cm of clear surface immediately in front of its output slot where the cushioning material can accumulate before being cut and used. Cluttering this zone with tape dispensers, labels, or tools is one of the most common setup mistakes.
Step 4: Manage Your Paper Roll Supply
On-demand packaging only works smoothly when paper rolls are immediately accessible. Running out mid-shift and hunting for a replacement roll is the on-demand equivalent of running out of pre-made bubble wrap — it breaks the workflow just as effectively.
Position backup rolls within arm’s reach. Most paper bubble machines accept rolls stored on a rear spindle or in a feed tray. Keep at least two additional rolls within the operator’s secondary reach zone (90 cm), either on a shelf directly below the machine or on a small side rack. This allows a roll change in under 60 seconds without leaving the station.
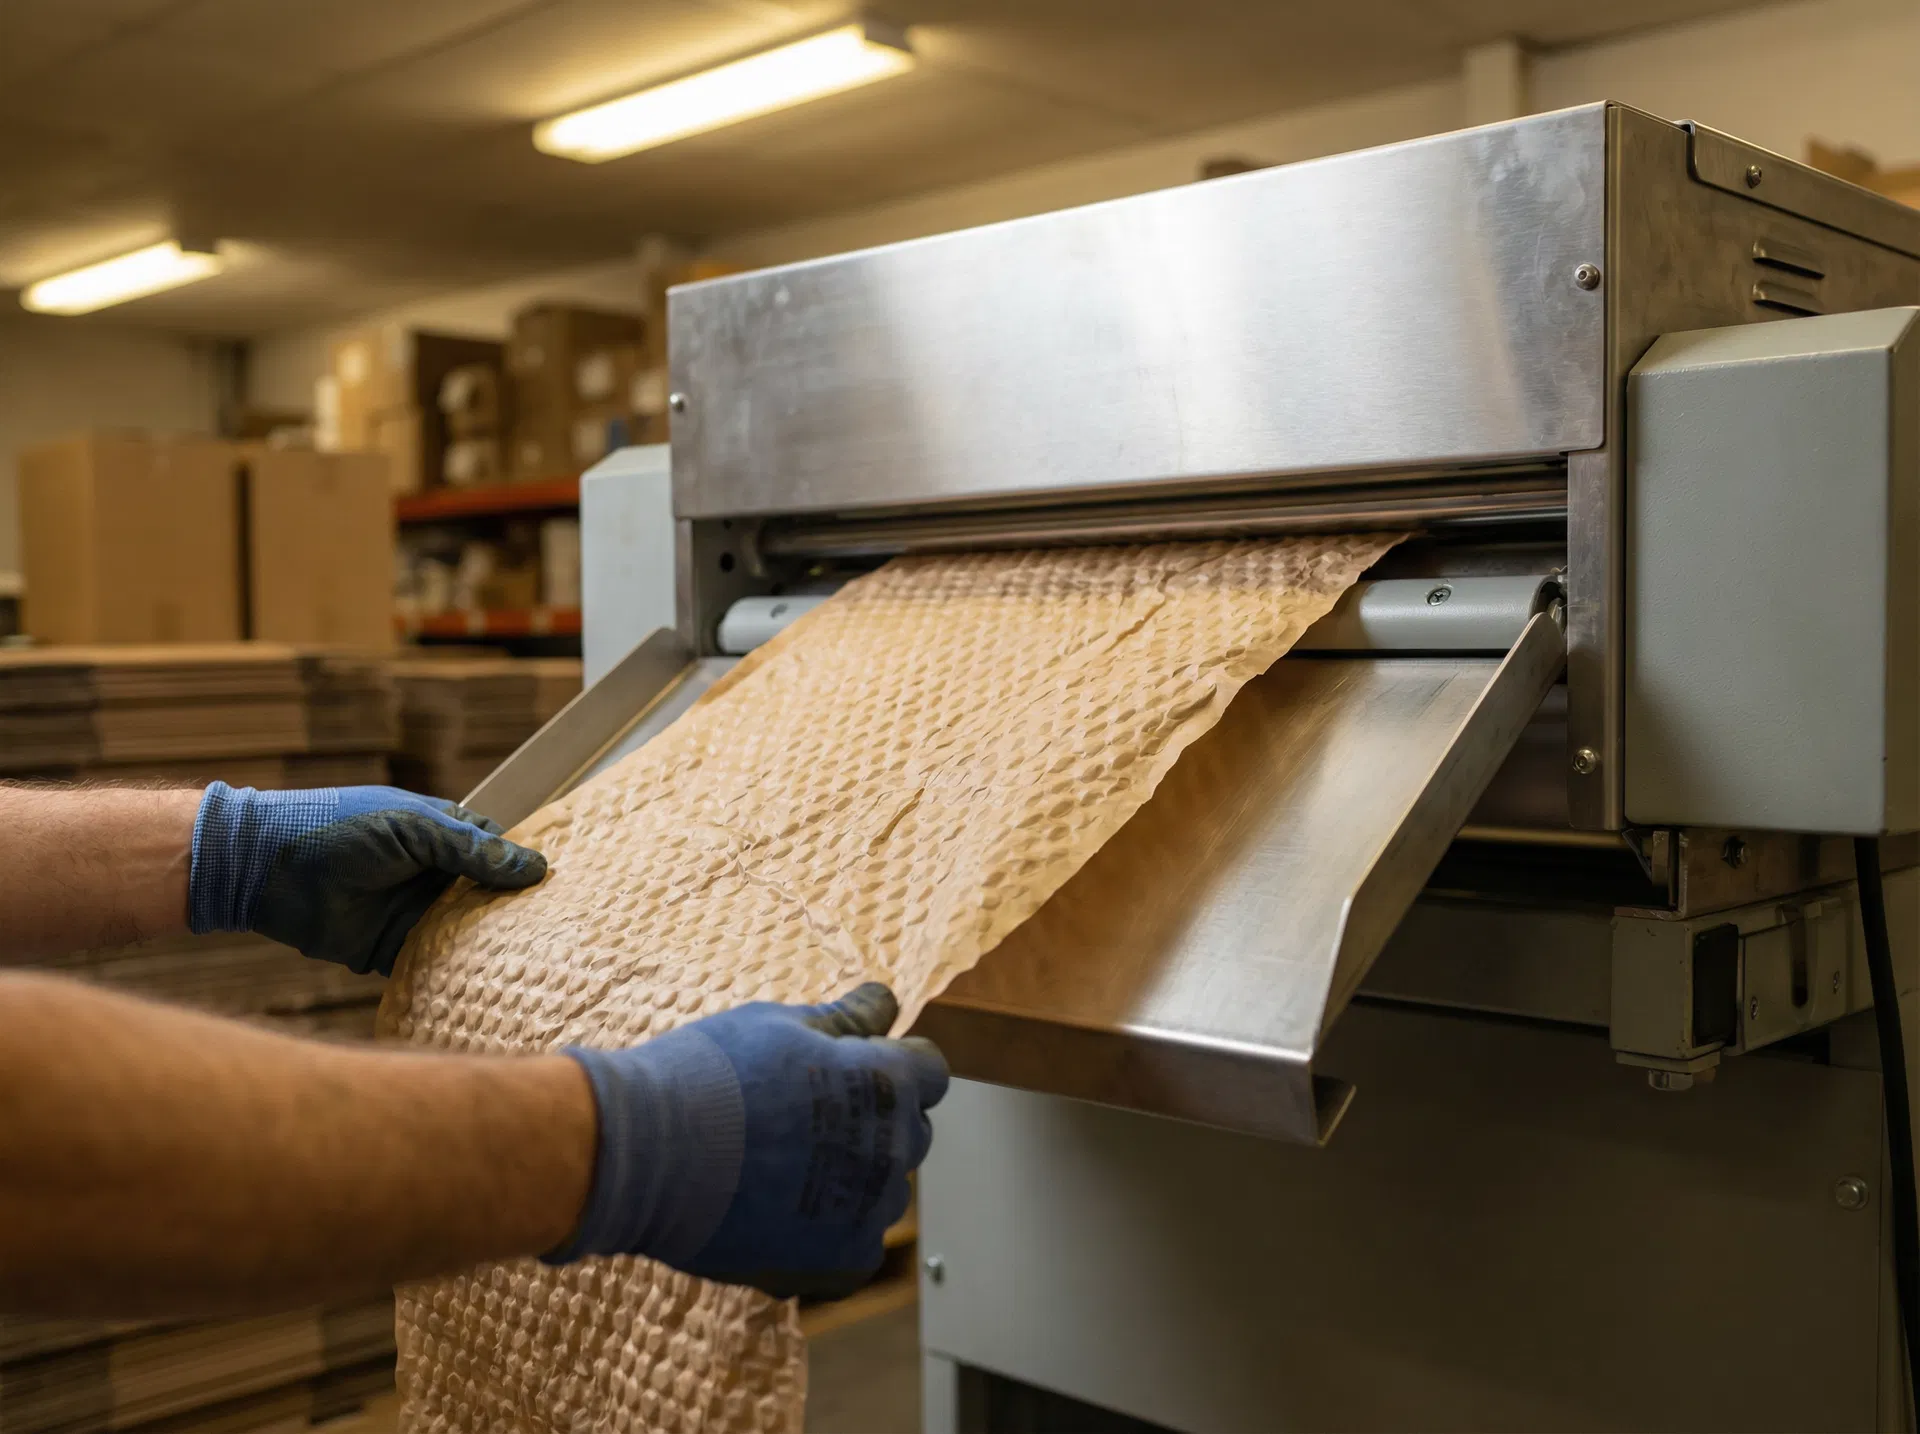
Choose the right paper format for your operation. Paper bubble machines typically accept either rolled paper (continuous feed) or fanfold paper (accordion-stacked). Rolled paper is more compact for storage and works well for high-volume continuous operation. Fanfold paper is easier to load and better suited for stations with limited rear clearance. Discuss your station dimensions with your equipment supplier before ordering consumables.
Establish a replenishment trigger. In high-volume operations, designate a minimum stock level — for example, one roll remaining at the station — that triggers a resupply from the main storage area. This prevents the “last roll” scenario where an operator discovers the shortage at the worst possible moment.
Step 5: Redesign the Workflow Sequence
Integrating a machine is only half the work. The other half is redesigning the packing sequence to take full advantage of it.
The most efficient packing sequence with an integrated paper bubble machine follows a simple linear flow:
Scan → Box → Activate → Wrap → Seal → Dispatch. The operator scans the order, selects the box, activates the machine to produce the needed cushioning, wraps the product, seals the box, and sends it down the conveyor. There are no detours to a material storage area, no pre-cutting of fixed-length pieces, and no guesswork about whether the material on hand is the right size.
This linear sequence only works if the machine, the product, the box, and the outgoing conveyor are all within the operator’s natural movement arc. Map this arc before finalizing placement — ideally by having an operator walk through the sequence with a mock product and observing where they naturally reach and turn.
Step 6: Train Your Team Properly
A paper bubble machine is intuitive to operate, but a brief, structured training session prevents the most common errors that reduce efficiency and increase material waste.
The key points to cover are: how to load and change paper rolls without stopping the line; how to adjust output length for different product sizes; how to recognize and clear a paper jam quickly; and how to interpret the machine’s status indicators. Most operators are fully proficient within one to two shifts, but the first few hours benefit from a supervisor or experienced colleague nearby.
It’s also worth discussing material usage expectations. On-demand doesn’t mean unlimited — operators should understand that the goal is to use the minimum effective amount of cushioning for each product, not to over-wrap out of habit. A simple visual guide showing recommended wrapping amounts for your most common product categories can reduce material consumption by 15–25% compared to unguided usage.
Step 7: Measure the Results
You can’t optimize what you don’t measure. After integrating the machine, track these four metrics over the first four weeks:
| Metric | How to Measure | Target Improvement |
| Packages per operator per hour | Count output at end of each shift | +15–30% vs. pre-integration baseline |
| Material consumption per package | Weigh or measure paper used per order | -15–25% vs. pre-made cushioning |
| Damage rate | Track claims and returns | Maintained or reduced |
| Operator satisfaction | Brief weekly check-in | Reduced fatigue, fewer complaints |
If throughput hasn’t improved within the first two weeks, revisit the placement and workflow sequence before assuming the machine is the issue. In most cases, suboptimal placement — the machine slightly too far from the operator’s dominant hand, or the output zone cluttered — is the root cause.
For a deeper look at how these efficiency gains translate to financial returns, see our guide on paper bubble machine ROI.
Common Integration Mistakes to Avoid
Even well-intentioned setups can underperform if a few key mistakes slip through. The most frequent issues we see at SelectPack are placing the machine on the non-dominant side of the bench (adding an unnecessary turn to every packing cycle); positioning it too far back so the operator must lean forward to reach the output; failing to designate a clear output zone so cushioning piles up against other tools; and neglecting to establish a paper roll replenishment system, leading to mid-shift shortages.
A related mistake is integrating the machine without adjusting the workflow sequence — simply adding the machine to an existing cluttered station without redesigning the flow around it. The machine becomes just another object on a crowded bench rather than the centerpiece of a streamlined process.
When to Add a Second Machine
A single paper bubble machine handles most packing stations comfortably up to 300–500 orders per day, depending on average wrapping time per product. Beyond that volume, or when you’re running multiple shifts with different product categories, a second machine at a parallel station — or a higher-throughput industrial model — becomes the more efficient path.
The signal to watch for is queue buildup at the packing bench. If operators are waiting for the machine to produce material rather than the machine waiting for operators to use it, you’ve reached the throughput ceiling of your current setup. For guidance on scaling to multi-station deployments, see our article on industrial paper bubble machines for high-volume operations.
FAQ
How long does it take to integrate a paper bubble machine into an existing packing station?
Physical installation typically takes 30–60 minutes — the machine is placed on the bench, the paper roll is loaded, and the power is connected. The larger time investment is in workflow redesign and operator training, which typically takes one to two shifts to complete properly.
Do I need to modify my existing bench or conveyor system?
In most cases, no. Desktop and mid-range paper bubble machines are designed to sit on standard packing benches without modification. If your bench is unusually low or high, a simple riser or stand can adjust the output height. Conveyor integration, if needed, is typically handled with a short gravity roller extension rather than any structural modification.
What’s the minimum order volume that justifies integrating a paper bubble machine?
There’s no hard threshold, but operations packing 30 or more orders per day typically see a clear efficiency improvement. Below that volume, the workflow benefits are real but the ROI timeline extends. For smaller operations, a desktop model with a minimal footprint is often the right starting point — it can grow with the business without requiring a station redesign.
Can the machine run continuously during a full shift?
Yes. Industrial and mid-range paper bubble machines are designed for continuous operation. Desktop models are also capable of full-shift use, though they may require slightly more frequent paper roll changes depending on average order volume. Regular maintenance — primarily keeping the rollers clean and the paper path clear — ensures consistent performance across long shifts.
References
Looking to upgrade your packing station with a paper bubble machine? Contact the SelectPack team to discuss your station layout and find the right machine for your operation. We also offer guidance on sustainable packaging certifications for businesses looking to align their packaging with environmental goals.
Footnotes
1.Sealed Air. “Pack Station Solutions.” Sealed Air UK Resources Blog. https://www.sealedair.com/uk/resources/blog/pack-station-solutions